Blog

  • How to Tattoo Middle and Inner Lip – What Every Professional Should Know

    Why Inner Lip Tattoos Stand Apart from Other Placements?

    Tattooing the inner lip, or the oral mucosa, presents a distinctive set of challenges that distinguish it significantly from other tattoo placements on the body. This delicate area is constantly exposed to moisture, movement, and a unique bacterial environment, all of which impact the tattooing process and the longevity of the artwork. For artists considering how to tattoo middle and inner lip, a deep understanding of these factors is paramount.

    The Demand vs. The Reality: Setting Client Expectations

    Despite their appeal for discretion and novelty, inner lip tattoos are notoriously impermanent. Many clients are drawn to the idea without fully grasping the temporary nature and potential risks. It’s crucial for tattoo artists to engage in honest, thorough consultations, setting realistic expectations about fading, potential blowouts, and the demanding aftercare required for this unique placement.

    Anatomy of the Lip: What Every Tattoo Artist Needs to Know

    A successful and safe inner lip tattoo, if attempted, hinges on a precise anatomical understanding. The oral cavity is a complex environment, and ignorance can lead to complications.

    The Mucous Membrane: A Delicate Canvas

    Unlike the keratinized skin found on most of the body, the inner lip is lined with a mucous membrane. This tissue is much thinner, more vascular, and lacks the robust protective layers that help ink retain its vibrancy and stay in place elsewhere. Mastering how to tattoo middle and inner lip requires adapting techniques to this delicate canvas.

    Blood Vessels and Nerves: High-Risk Zones

    The lips are richly supplied with blood vessels and nerve endings. This high vascularity means increased bleeding during the tattoo process, which can obscure the work area and affect ink retention. The density of nerve endings also contributes to heightened pain perception, making client comfort a priority.

    Saliva and Constant Moisture: A Challenge for Ink Retention

    The constant presence of saliva and moisture in the mouth is a primary reason for the rapid fading of inner lip tattoos. Saliva not only dilutes ink pigments but also washes them away during the healing process, significantly impacting pigment retention and the overall longevity of the tattoo.

    Musculature and Movement: Contributing to Fading

    The lips are constantly in motion, involved in speaking, eating, and expressing emotions. This continuous movement stretches and compresses the tattooed tissue, contributing to the premature breakdown and migration of tattoo ink. Tattoo pigment migration is a common issue in this area.

    The Temporary Nature of Inner Lip Tattoos: Fading and Longevity

    One of the most important aspects to convey about inner lip tattoos is their inherent lack of permanence. They are not like traditional tattoos.

    Why Inner Lip Tattoos Don’t Last: The Science Behind the Fade

    The combination of thin mucous membrane, constant moisture and saliva, high cell turnover rate in the oral lining, and continuous muscular movement means that ink deposited in the inner lip is rapidly expelled or absorbed by the body. This leads to significant inner lip tattoo fading, often within months or a few years, unlike tattoos on other body parts.

    Understanding “Blowouts” and Ink Migration in the Lip

    Due to the delicate nature of the mucous membrane, blowouts (where ink spreads beyond the intended lines, often appearing blurry) are a common risk. This occurs when the needle penetrates too deeply, causing ink to migrate into the surrounding, less dense tissue. Tattoo blowouts lip cases are frequently reported.

    Realistic Client Consultation: Managing Expectations About Permanence

    Before ever attempting to tattoo the inner lip, a comprehensive and frank discussion with the client is non-negotiable. Artists must clearly explain that these tattoos are temporary, prone to fading, and may not look perfect for long. Understanding the limitations is key to client satisfaction and managing expectations.

    Safety and Health Risks: Prioritizing Your Client’s Well-being

    The oral cavity is home to a vast array of bacteria, making safety and hygiene paramount when considering how to tattoo the middle and inner lip.

    Infection Risks: Oral Bacteria and Open Wounds

    The mouth is a warm, moist environment teeming with bacteria. Any open wound, such as a fresh tattoo, is highly susceptible to infection. Oral tattoo aftercare is critical to mitigate these risks. Artists must be hyper-vigilant about cleanliness and provide strict aftercare instructions to prevent complications like oral infections.

    Allergic Reactions and Sensitivities in the Oral Cavity

    While rare, allergic reactions to tattoo ink can occur. In the sensitive oral cavity, such reactions can be particularly uncomfortable and challenging to manage, potentially leading to swelling, prolonged healing, and discomfort. Tattoo ink types and their properties should be well-researched.

    Potential for Scarring and Tissue Damage

    Aggressive tattooing, improper needle depth, or repeated trauma to the delicate mucous membrane can lead to scarring or permanent tissue damage. This is a significant concern given the visibility and functionality of the lips.

    Cross-Contamination Prevention: The Highest Standard of Hygiene

    Maintaining a sterile field for oral procedures is even more critical than for other body parts. Cross-contamination prevention requires meticulous attention to universal precautions in a tattoo studio, including proper barrier methods, single-use needles, and stringent sterilization protocols. This protects both the client and the artist from bloodborne pathogens.

    Ethical Considerations for Tattooing the Inner Lip

    Beyond the technical challenges, ethical considerations play a huge role in how to tattoo middle and inner lip safely and responsibly.

    Informed Consent: Ensuring Clients Understand the Risks and Limitations

    The informed consent process for inner lip tattoos must be exceptionally thorough. Clients must understand not only the immediate risks but also the high likelihood of fading, color change, and the need for potential touch-ups or acceptance of impermanence. This goes beyond standard consent forms.

    The Professional’s Responsibility: When to Decline a Tattoo

    A responsible tattoo artist understands when to decline a tattoo, particularly for placements with high risks or low success rates. If a client has unrealistic expectations or if the artist is not fully confident in their ability to minimize harm in this difficult area, declining the request is the ethical choice. Tattoo artist ethics demand prioritizing client well-being over profit.

    Legal and Liability Aspects of Lip Tattooing

    Given the higher propensity for complications, artists should be aware of the increased legal and liability aspects associated with tattooing such a delicate and high-risk area. Proper documentation of informed consent and adherence to all health regulations is crucial.

    Equipment and Setup for Inner Lip Tattooing (If Attempted)

    If an artist chooses to attempt an inner lip tattoo, the following specialized considerations apply, always with the understanding that this is a particularly challenging endeavor:

    Needle Configuration Considerations for Delicate Areas

    Smaller, tighter grouping needle configurations are often preferred to minimize tissue trauma and allow for more precise lines in such a confined space. Understanding different tattoo needle configurations and their applications is vital. Generally, a small round liner or shader is used.

    Ink Selection and Pigment Retention

    Selecting high-quality, vibrant inks is important, though even the best inks struggle with pigment retention in the inner lip. Some artists believe specific pigments might perform marginally better, but rapid fading remains inevitable. Tattoo ink types influence initial appearance but not long-term permanence here.

    Sterile Field Setup for Oral Procedures

    The sterile field setup for an inner lip tattoo requires even more vigilance. Beyond standard procedures, measures to isolate the working area from excessive saliva and to ensure a dry, decontaminated surface are paramount. This includes using dental bibs or other absorbent barriers.

    Client Positioning and Access

    Proper client positioning is crucial for access and comfort. Clients typically recline, with their head supported to allow the artist clear visibility and stable access to the inner lip. Maintaining a steady field is difficult due to the client’s natural reflexes.

    The Tattoo Process: Techniques and Challenges

    Even for experienced artists, tattooing the inner lip presents unique technical hurdles.

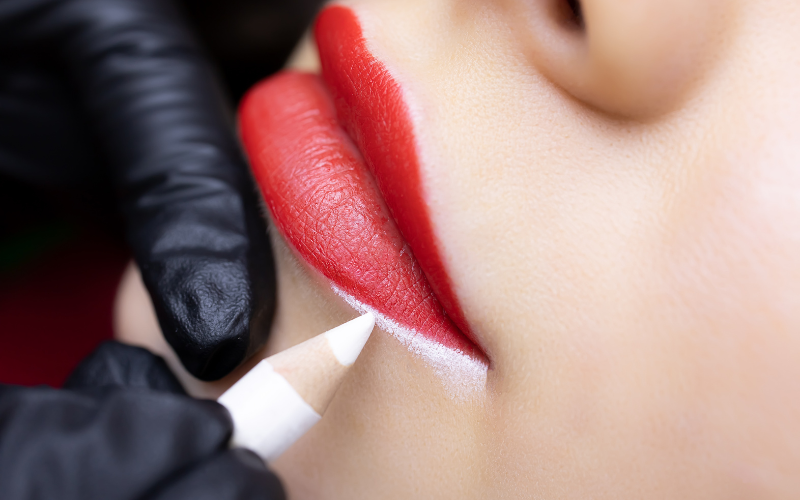
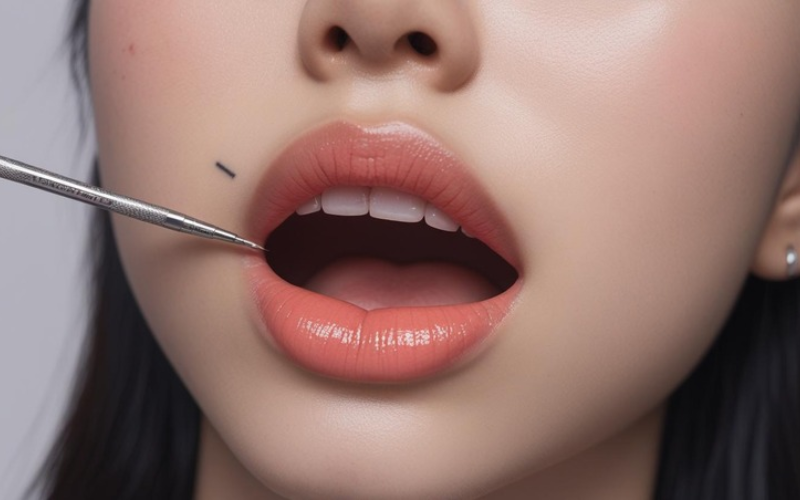
    Stenciling on a Wet, Moving Surface: Overcoming the Obstacles

    Applying a stencil that adheres and remains clear on a wet, movable mucous membrane is incredibly difficult. Many artists for tattooing the middle and inner lip resort to freehand drawing with a skin marker, or using very precise, quick stencil application methods.

    Needle Depth and Pressure: Avoiding Tissue Damage

    Maintaining consistent, shallow needle depth is paramount to avoid blowouts and minimize trauma to the thin tissue. Too much pressure can cause severe damage, while too little will result in poor ink implantation and even faster fading. This area demands exceptionally light-handed technique.

    Managing Bleeding and Saliva During the Process

    Constant bleeding and saliva production necessitate frequent wiping and drying of the area, which can slow down the process and make it harder to see. Artists must be prepared to manage these fluids efficiently and hygienically.

    Pain Management and Client Comfort

    Due to the high concentration of nerve endings, inner lip tattoos can be quite painful. Utilizing topical oral anesthetics (if legal and safe) and ensuring the client is comfortable and able to take breaks are important for a manageable experience. Understanding the tattoo pain scale lip is helpful.

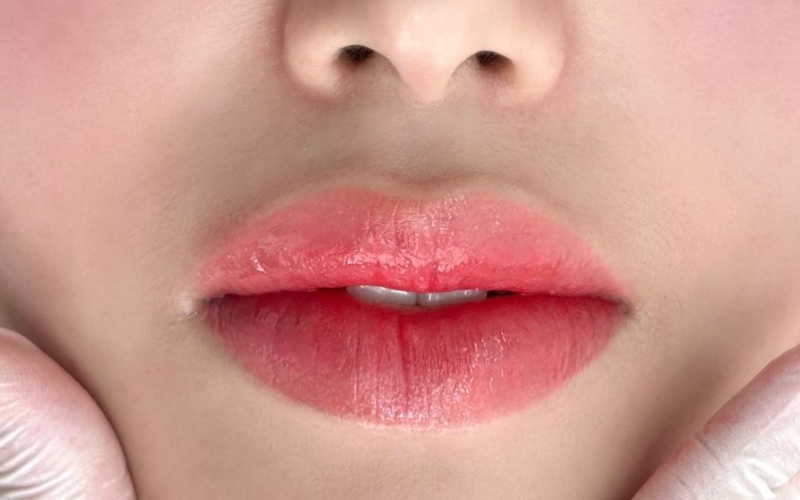
    Aftercare for Inner Lip Tattoos: Crucial for Healing and Preventing Complications

    Proper aftercare is perhaps even more critical for inner lip tattoos due to the high risk of infection and unique healing environment.

    Immediate Aftercare Instructions: Rinsing and Hygiene

    Clients should be instructed on frequent, gentle rinsing with an antibacterial mouthwash (alcohol-free) or saline solution, especially after meals, to keep the area clean and reduce bacteria. Proper oral hygiene is absolutely essential.

    Dietary Considerations During Healing

    Avoiding spicy, acidic, or very hot foods is advised, as these can irritate the fresh tattoo. Soft, bland foods are preferable, and thorough rinsing after eating is non-negotiable. Clients should also refrain from alcohol and smoking, as these can impede healing.

    Signs of Infection and When to Seek Medical Attention

    Clients must be educated on the signs of infection: excessive swelling, redness, pus, foul odor, prolonged pain, or fever. They should be advised to seek medical attention immediately if any of these symptoms appear. Oral piercing risks often align with oral tattoo complications.

    Long-term Care and Expectations of Fading

    Even with perfect aftercare, fading is inevitable. Clients should be reminded of this long-term expectation and understand that the tattoo will likely require touch-ups or simply fade away.

    Alternatives to Traditional Inner Lip Tattoos

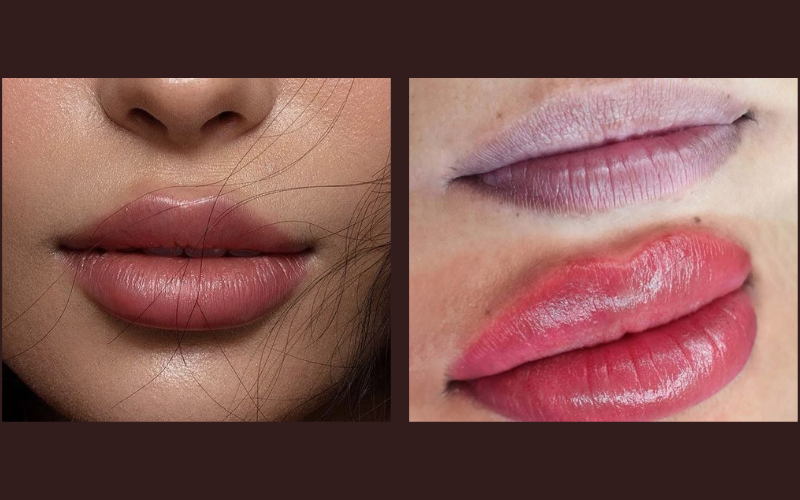
    For those considering longer-lasting options, semi-permanent lip blush tattoo procedures offered by professional PMU studios like Hivivi can provide a safer and more durable alternative, with natural-looking results and significantly less risk than inner lip tattoos.

    Lipstick Brands Designed for Longer Wear

    Long-wear or transfer-proof lipsticks offer a non-permanent way to customize lip appearance with a vast array of colors and finishes. This is a much safer and versatile option for temporary lip decor.

    Other Delicate Tattoo Placements with Better Longevity

    For clients desiring a discreet or symbolic tattoo, other delicate tattoo placements may offer significantly better longevity and fewer risks, such as small designs behind the ear, on the side of a finger (though still highly prone to fading), or on the wrist. Permanent makeup lips are also separate procedures with distinct considerations.

    Conclusion: Is Tattooing the Inner Lip Worth the Risks?

    Recap of Challenges and Impermanence

    Tattooing the inner lip is fraught with unique challenges: delicate anatomy, high infection risk, inevitable fading, and potential for blowouts and tissue damage. Its impermanence means clients often pay for a tattoo that disappears quickly.

    Professional Advice: Proceed with Extreme Caution or Avoid

    For artists, the professional advice tends to be “proceed with extreme caution” or, more commonly, “avoid altogether.” Given the high risks, low longevity, and potential for client dissatisfaction, many reputable artists decline to perform this service. Responsible tattoo artist training emphasizes these practical and ethical dilemmas.

    Prioritizing Client Health and Your Professional Reputation

    Ultimately, a professional tattoo artist’s prime responsibility is to prioritize client health and well-being. Performing inner lip tattoos carries inherent risks that can jeopardize not only the client’s health but also an artist’s professional reputation if complications arise or expectations are not met. While the demand exists, understanding how to tattoo middle and inner lip responsibly often means advising against it or providing a highly comprehensive, cautionary consultation.

  • Types of Eyebrow Tattoo: Your Complete Guide to Perfect Brows

    Dreaming of perfectly shaped, smudge-proof eyebrows? Eyebrow tattooing offers a revolutionary solution, but with so many options available, it can be overwhelming to choose the right one. This comprehensive guide will break down the different types of eyebrow tattoos, helping you understand their techniques, benefits, and which method is best suited for your desired look and skin type.

    From the subtle enhancement of microblading to the defined finish of ombre brows, we’ll explore each technique in detail, providing you with the knowledge you need to make an informed decision and achieve your ideal brows. Let’s delve into the world of permanent and semi-permanent eyebrow solutions!

    Understanding Eyebrow Tattooing: Permanent vs. Semi-Permanent

    Before diving into specific types, it’s crucial to differentiate between traditional eyebrow tattoos and modern semi-permanent makeup techniques. This section clarifies the terminology, highlighting the key differences in longevity, pigment depth, and the evolution of the industry.

    • Traditional Eyebrow Tattoo: This older method uses conventional tattoo ink and a machine to implant pigment deep into the skin’s dermal layer. While it is permanent, the ink can fade over many years, often turning a bluish-grey, and the result is typically a solid, block-like brow that can look harsh and unnatural.
    • Semi-Permanent Eyebrow Makeup (PMU): The modern standard, also known as cosmetic tattooing, uses specialized cosmetic-grade pigments. These pigments are implanted into the superficial layers of the skin (the epidermis). This allows the brows to fade naturally over one to three years, enabling adjustments to shape and color as styles and facial features change. The goal of PMU is to create a more natural, nuanced result.

    Key Differences: Longevity, Technique, and Appearance

    Here’s a clear comparison of the key distinctions:

    • Durability: Traditional tattoos last for many years (often a lifetime), whereas semi-permanent PMU techniques last 1-3 years before requiring a color boost.
    • Pigment type: Traditional methods use body art tattoo ink, while PMU uses cosmetic pigments formulated to fade true to their original color.
    • Application depth: Traditional tattoos go deep into the dermis. PMU is applied much more shallowly, into the superficial epidermis.
    • Result: Traditional tattoos often result in a bold, solid block of color. Modern PMU techniques can achieve realistic hair-like strokes or soft, powdered makeup effects.

    The Most Popular Types of Eyebrow Tattoos

    This is the core of your content, detailing each major type. Aim for clarity, comparison, and visual descriptions.

    1. Microblading: The Hair Stroke Illusion

    • Technique: A technician uses a manual hand tool with a row of tiny needles to create crisp, fine incisions in the skin that mimic the look of natural eyebrow hairs. Pigment is deposited into these feather-like strokes.
    • Best For: Individuals with sparse brows wanting to fill in gaps, a desire for very natural-looking hair strokes, and those with normal to dry skin types.
    • Pros: Creates an extremely natural, textured appearance. It is ideal for subtly enhancing existing brows and adding realistic fullness where hair is missing.
    • Cons: Not the best choice for oily skin, as excess oil can cause the hair strokes to blur and fade faster. It may require more frequent touch-ups than other methods.
    • Heal Time & Aftercare: Expect initial redness and minor scabbing for 7-14 days. Following strict aftercare, like keeping brows dry and applying healing balm, is critical for pigment retention.

    2. Ombre Brows (Powder Brows): The Soft, Gradual Fill

    • Technique: This type of eyebrow tattoo is applied using a digital machine that deposits pigment in thousands of tiny, pixelated dots. This creates a soft, powdered makeup look, which is typically lighter at the front of the brow and gradually darkens towards the tail.
    • Best For: All skin types, but especially beneficial for oily or mature skin. It’s perfect for clients who regularly fill in their brows with powder or a pencil and desire a defined, polished look.
    • Pros: Has excellent color retention on oily skin, generally lasts longer than microblading, and is less invasive on the skin. The intensity can be customized from soft and subtle to bold and defined.
    • Cons: It looks less like individual hairs and more like makeup. The initial appearance immediately after the procedure can be significantly darker than the final healed result.
    • Heal Time & Aftercare: The healing process is similar to microblading, involving a period of scabbing and flaking. Avoiding water, sweat, and sun exposure is crucial during the initial healing phase.

    3. Combination Brows: The Best of Both Worlds

    • Technique: This popular method is a hybrid that blends two techniques. It typically involves creating natural hair strokes with microblading at the front of the brow, then seamlessly blending into a machine-shaded ombre effect from the mid-brow to the tail.
    • Best For: Clients who want both natural texture and polished definition. It is excellent for those with very sparse brows who need structure but still want a realistic look. It’s suitable for most skin types.
    • Pros: Delivers the realistic texture of hair strokes combined with the added density and definition of powder shading, creating a beautifully balanced and versatile brow.
    • Cons: It can be slightly more expensive due to the complexity of using two different techniques. It requires a highly skilled and versatile artist to execute flawlessly.
    • Heal Time & Aftercare: Follow combined healing protocols, being gentle with the entire brow area and adhering to the artist’s specific aftercare instructions.

    4. Nano Brows (Nanoblading): The Next Evolution of Hair Strokes

    • Technique: Nano brows use a digital machine with a single, ultra-fine needle to create precise hair strokes. Unlike the incisions of microblading, this method implants pigment dot by dot to build a stroke, causing less trauma to the skin.
    • Best For: All skin types, including oily and sensitive skin. It is ideal for anyone seeking hyper-realistic hair strokes that are more durable than microblading.
    • Pros: Causes less trauma to the skin, which can lead to better pigment retention and faster healing. The strokes are more precise and crisp, making it an excellent choice for those whose skin might blur microblading strokes.
    • Cons: This is a newer, more advanced technique that can be more expensive and may not be as widely available as microblading or ombre brows.
    • Heal Time & Aftercare: Healing is often slightly quicker and easier than microblading due to the reduced skin trauma. Standard aftercare rules still apply.

    5. Henna Brows: The Temporary Tinting Solution (for comparison)

    While not a tattoo, henna brows are often discussed alongside these treatments. It’s important to understand the difference as you explore brow enhancements.

    • Technique: A natural, plant-based dye (henna) is used to stain the skin beneath the brow hairs as well as the hairs themselves. This creates a temporary shadow of a fuller brow shape. It lasts approximately 2-4 weeks.
    • Best For: A trial run for a brow shape or color, a temporary enhancement for a special event, or for those who are opposed to needles.
    • Pros: It is completely non-invasive, temporary, and a great way to experiment with a fuller look without commitment.
    • Cons: The results are very temporary and it is not a tattoo. The color range can be more limited compared to cosmetic pigments.

    Choosing the Right Eyebrow Tattoo Type for You

    This section acts as a decision-making guide, helping users apply the information to their needs.

    Consider Your Desired Look:

    • Natural & Undetectable: Choose Microblading or Nano Brows for realistic hair strokes.
    • Soft, Makeup-Filled: Opt for Ombre Brows for a polished, powdered finish.
    • Structured & Defined: Combination Brows or a bold Ombre Brow style will achieve this look.

    Assess Your Skin Type:

    • Oily Skin: Ombre Brows and Nano Brows offer the best pigment retention and stroke clarity.
    • Normal/Dry Skin: All types are suitable, but Microblading and Nano Brows excel at creating crisp, texture-rich results.
    • Sensitive Skin: Nano Brows are often the best choice due to the reduced trauma to the skin.

    Evaluate Your Existing Brows:

    • Sparse Areas: Microblading, Nano Brows, or Combination Brows are perfect for filling in gaps.
    • No Brows/Full Reconstruction: Ombre Brows or Combination Brows provide the necessary structure and density.
    • Fuller Brows Needing Definition: Ombre Brows or Combination Brows can add shape and polish.

    Factor in Longevity & Maintenance:

    • Frequent Touch-ups Acceptable: Microblading may require annual touch-ups.
    • Less Frequent Touch-ups: Ombre, Combination, and Nano brows often last longer, from 1.5 to 3 years.

    The Eyebrow Tattoo Process: What to Expect

    A brief overview to set expectations and encourage user confidence.

    • Consultation: You and your artist will discuss goals, map out your ideal brow shape, select a pigment color, and perform a patch test for allergies.
    • Numbing: A topical anesthetic cream is applied to the brow area to ensure comfort throughout the procedure.
    • Application: The artist carefully performs the chosen technique (microblading, ombre, etc.). This typically takes 1-2 hours.
    • Aftercare & Healing: You will be given specific instructions on how to care for your new brows, which is critical for achieving the best results.
    • Touch-Up Session: A perfecting session is usually scheduled for 6-8 weeks after the initial appointment to fill in any areas that may have healed lighter and perfect the final shape.

    Important Considerations Before Getting Eyebrow Tattoos

    • Finding a Qualified Artist: This is the most crucial step. Research artists thoroughly, review their portfolio, and check for proper licensing, certifications, and positive reviews.
    • Safety and Hygiene: Ensure the studio is clean and that the artist uses single-use, disposable needles and tools.
    • Cost: Prices vary based on location, artist experience, and technique. The price usually includes the initial appointment and the first touch-up.
    • Pain Level: Most clients report only mild discomfort, often described as a scratching sensation. The numbing cream is very effective.
    • Contraindications: You may not be a candidate if you are pregnant/nursing, have certain skin conditions (like eczema on the brow area), or are on blood-thinning medication.
    • Allergies: A patch test should always be performed 24-48 hours prior to the procedure to check for any reaction to the pigment or numbing cream.

    For expert tips, real experiences, and PMU advice from a trusted beauty professional, visit vivitag.

    Eyebrow Tattoo Aftercare: Ensuring Long-Lasting Results

    Proper aftercare is just as important as the procedure itself for beautiful, lasting brows.

    • Initial Healing Phase (Days 1-14): Your brows will appear dark and bold initially. They will go through a period of scabbing, flaking, and may even seem to disappear before the color re-emerges. It is vital to keep them clean and dry, avoiding makeup, excessive sweating, and sun exposure.
    • Long-Term Care: To protect your investment, always apply sunscreen (SPF 30+) to your brows. Avoid using skincare with acids (AHA, BHA, glycolic) and retinoids directly on the tattooed area, as these can prematurely fade the pigment.
    • When to Get a Touch-Up: You’ll know it’s time for a refresh when the color appears significantly faded or the shape has lost its definition.

    FAQs About Eyebrow Tattoos

    Address common questions directly.

    • How long do eyebrow tattoos last? Semi-permanent eyebrow tattoos last 1-3 years, depending on the technique, your skin type, and lifestyle.
    • Does eyebrow tattooing hurt? With topical numbing cream, the procedure is generally well-tolerated. Most clients report minimal to no pain.
    • Can I remove an eyebrow tattoo? Yes, unwanted cosmetic tattoos can be lightened or removed through professional saline or laser removal services, though it requires multiple sessions.
    • Will my natural eyebrow hairs grow back? Yes. Cosmetic tattooing is done in the superficial layers of skin and does not damage the hair follicles. Your natural hair will continue to grow as normal.
    • What if I don’t like the result? The most important step is choosing a reputable artist. Minor adjustments can be made at the touch-up session. Significant changes would require removal procedures.
    • Can I wear makeup on my tattooed brows? After they are fully healed (usually around 14 days), you can apply makeup as desired, though many find they no longer need to.

    Ready to transform your brows? Understanding the different types of eyebrow tattoos is the first step towards achieving your dream look. By considering your desired aesthetic, skin type, and consulting with a reputable artist, you can confidently choose the perfect technique for stunning, long-lasting eyebrows.

    This content is for informational purposes only and does not constitute medical advice. Always consult with a qualified professional before undergoing any cosmetic procedure.

  • The Lip Blush Healing Journey: What to Expect for a Perfect Pout

    The dream of waking up with perfectly tinted, defined lips is a major draw for cosmetic tattooing. Lip blush, a popular semi-permanent makeup procedure, offers a subtle wash of color that enhances your natural shape and cuts down on daily makeup routines. This gentle tattooing technique can give you the pout you’ve always wanted, but the real magic happens after you leave the salon.

    The secret to stunning, long-lasting lip blush results lies in the healing process. How you care for your lips in the days and weeks following your appointment directly impacts color retention, final appearance, and overall skin health. Think of it as the foundation for your investment.

    This guide provides a detailed, day-by-day breakdown of the entire lip blush healing journey. We’ll walk you through each stage, cover essential aftercare, and address common concerns so you can feel confident and informed. Remember, achieving your beautiful lip blush transformation is a process, not an overnight result, and patience is your most valuable tool.

    Lip Blush Healing Day-by-Day: Detailed Expectations

    Understanding the chronological stages of lip blush recovery helps manage expectations and ensures you’re providing the right care at the right time. Here’s what your healing timeline will likely look like.

    Day 1: Immediate After the Lip Blush Procedure (The “Bold” Stage)

    Right after your appointment, your lips will look incredibly vibrant and bold. The color will appear much darker and more intense than the final, settled shade – this is completely normal. You can also expect mild to moderate lip blush swelling, tenderness, and a “fat lip” feeling. Some people may experience minor bruising.

    Your lips may also ooze a clear fluid called lymph. This is your body’s natural healing response. Your artist will instruct you to gently blot your lips with a clean, damp cotton pad to remove this fluid and prevent it from forming heavy scabs. Avoid touching your lips with your fingers, and you can apply a cold compress (wrapped in a clean cloth) for 10-minute intervals to help with swelling.

    Days 2-3: The Swelling & Sensitivity Peak

    Welcome to peak swelling. Your lips might feel even more swollen on day two than they did immediately after the procedure. The color will remain intense, and your lips will feel very dry and tight. This is a critical time for post lip blush care.

    To stay comfortable, eat soft, non-spicy foods in small bites. While some people use a straw, it can create pressure and friction on healing lips, so it’s often best to drink carefully from a glass. To help minimize swelling, try sleeping with your head slightly elevated on an extra pillow.

    Days 4-7: The Peeling Phase (The “Ghosting” Stage)

    During this phase, the swelling will subside significantly, and the lip blush peeling process will begin. Your lips will start to flake, revealing a much lighter color underneath. It is absolutely crucial that you do not pick, peel, or scratch the flaking skin. Doing so can pull out the pigment, leading to patchy results, scarring, and an increased risk of infection.

    As the top layer sheds, you’ll likely experience the “ghosting” or “milky” phase. The color may seem to disappear or look very pale and uneven. Don’t panic! This is a normal part of the healing stages of lip blush. The true color is developing in the deeper layers of your skin and will bloom again over the next few weeks. Keep moisturizing diligently to manage any itchiness and help the skin shed naturally.

    Weeks 1-2: The True Color Begins to Emerge

    By now, the peeling should be complete, and your lips will feel much less sensitive. The ghosting phase will start to fade as the pigment begins to resurface. You’ll notice the color slowly “blooming,” becoming more visible each day. It may still appear lighter than your final desired shade, but the initial patchiness will even out. Continue to protect your lips with a moisturizing balm.

    Weeks 3-6: Final Color Settles & Touch-Up Window

    This is when the grand reveal happens. The true, final color of your permanent lip color will fully settle and stabilize in your skin. The texture of your lips will be back to normal. This is also the perfect time to assess your lip blush results. You can now see the final healed shape and pigment density.

    Most lip blush procedures require a touch-up session, typically scheduled around 6-8 weeks after the initial appointment. The lip blush touch up is essential for perfecting the color, filling in any areas where pigment didn’t take as well, and ensuring the longevity of your cosmetic tattooing. If you’re searching for a trusted provider who specializes in lip blush color correction and flawless touch-up sessions, Hivivi offers expert solutions tailored to your healing stage.

    Full Healing & Long-Term Care (Beyond 6 Weeks)

    After your touch-up has fully healed (following a similar, but often shorter, timeline), your lip blush journey is complete. To maintain your beautiful results, sun protection is non-negotiable. Apply a lip balm with SPF daily, as UV exposure can fade the pigment prematurely. Stay hydrated and avoid using harsh exfoliants like retinoids or acids directly on your lips. With proper care, your results can last 1-3 years before a color refresh is needed.

    Lip Blush Aftercare: Your Guide to Optimal Results

    Following a strict aftercare routine is just as important as choosing a skilled artist. Proper lip tattoo aftercare protects your investment and ensures the best possible pigment retention.

    The D.O.s of Lip Blush Aftercare

    • Moisturize, Moisturize, Moisturize: Keep your lips constantly hydrated with an approved lip blush aftercare balm provided by your artist. Apply a thin layer frequently throughout the day.
    • Gentle Cleaning: Blot your lips with a clean tissue or damp cotton pad as directed, especially during the first 24 hours.
    • Stay Hydrated: Drink plenty of water to help your skin heal from the inside out.
    • SPF Protection: Once the peeling is complete, use a lip balm with SPF 30 or higher to protect your results from fading.
    • Eat & Drink Carefully: Stick to non-greasy, non-spicy, and room-temperature foods for the first few days.
    • Sleep Elevated: Use an extra pillow for the first couple of nights to help reduce swelling.
    • Practice Hygiene: Always wash your hands before touching your lips and use a clean pillowcase.

    The DON’Ts of Lip Blush Aftercare

    • No Picking or Peeling: This is the golden rule. Let the skin flake off naturally to avoid ruining your results.
    • Avoid Extreme Temperatures: Steer clear of hot showers, saunas, steam rooms, and direct sun exposure during the initial healing period.
    • No Lip Makeup: Do not apply any lipstick, gloss, or chapstick (other than your aftercare balm) until your lips are fully healed.
    • Avoid Certain Products: Keep cleansers with acids (AHA/BHA), retinoids, and whitening toothpaste away from your lips.
    • Minimize Mouth Stretching: Avoid big bites, excessive laughing, or kissing for the first few days.
    • No Swimming: Stay out of pools, hot tubs, lakes, and oceans to prevent infection.
    • Avoid Sweaty Workouts: Limit intense exercise for the first week, as sweat can irritate the healing skin.

    Common Lip Blush Healing Concerns & When to Seek Professional Advice

    It’s natural to have questions during your lip blush recovery. Here’s a quick guide to what’s normal and what’s not.

    It’s Normal If…

    • You experience swelling, tenderness, and tightness for the first few days.
    • The color looks extremely bold initially.
    • Your lips feel very dry and start to flake or peel around day 4.
    • The color seems to fade or “ghost” after peeling.
    • You have mild itching as the skin heals.

    When to Contact Your Artist or Doctor (Red Flags)

    While rare, infections can happen. Contact your artist or a healthcare professional immediately if you experience:

    • Excessive swelling or pain that worsens over time.
    • Green or yellow pus, a foul odor, or persistent oozing after day 2.
    • Severe redness or warmth that spreads beyond the lips.
    • Fever or chills.
    • A sudden rash or signs of an allergic reaction.

    What Influences Your Lip Blush Healing?

    Every individual heals differently. Several factors can influence your personal healing timeline and final results:

    • Genetics and Metabolism: Your body’s natural healing rate plays a significant role.
    • Skin Type and Age: Oily skin may heal differently than dry skin, and mature skin may take longer to regenerate.
    • Immune System Health: A strong immune system supports a smoother healing process.
    • Adherence to Aftercare: Following instructions is the biggest factor you can control.
    • Artist’s Technique: A skilled artist’s gentle hand minimizes trauma to the skin.
    • Pre-existing Conditions: If you are prone to cold sores, you must take preventative medication to avoid a lip blush cold sore outbreak, which can affect pigment retention.

    Embrace Your Beautiful Lip Blush Results

    The lip blush healing process is a journey of transformation. By understanding the stages, committing to proper aftercare, and practicing a little patience, you set yourself up for success. The initial week of swelling and peeling is a small price to pay for years of effortless, beautifully tinted lips.

    Trust the process, follow your artist’s guidance, and get ready to enjoy the stunning, natural-looking results of your permanent makeup investment. Your perfect pout is just a healing journey away.

  • Hello world!

    Welcome to WordPress. This is your first post. Edit or delete it, then start writing!