The dream of waking up with perfectly tinted, defined lips is a major draw for cosmetic tattooing. Lip blush, a popular semi-permanent makeup procedure, offers a subtle wash of color that enhances your natural shape and cuts down on daily makeup routines. This gentle tattooing technique can give you the pout you’ve always wanted, but the real magic happens after you leave the salon.
The secret to stunning, long-lasting lip blush results lies in the healing process. How you care for your lips in the days and weeks following your appointment directly impacts color retention, final appearance, and overall skin health. Think of it as the foundation for your investment.
This guide provides a detailed, day-by-day breakdown of the entire lip blush healing journey. We’ll walk you through each stage, cover essential aftercare, and address common concerns so you can feel confident and informed. Remember, achieving your beautiful lip blush transformation is a process, not an overnight result, and patience is your most valuable tool.
Lip Blush Healing Day-by-Day: Detailed Expectations
Understanding the chronological stages of lip blush recovery helps manage expectations and ensures you’re providing the right care at the right time. Here’s what your healing timeline will likely look like.
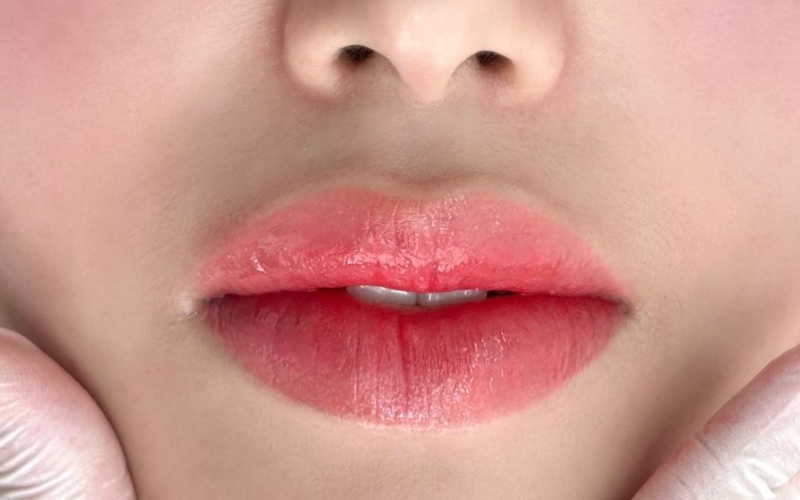
Day 1: Immediate After the Lip Blush Procedure (The “Bold” Stage)
Right after your appointment, your lips will look incredibly vibrant and bold. The color will appear much darker and more intense than the final, settled shade – this is completely normal. You can also expect mild to moderate lip blush swelling, tenderness, and a “fat lip” feeling. Some people may experience minor bruising.
Your lips may also ooze a clear fluid called lymph. This is your body’s natural healing response. Your artist will instruct you to gently blot your lips with a clean, damp cotton pad to remove this fluid and prevent it from forming heavy scabs. Avoid touching your lips with your fingers, and you can apply a cold compress (wrapped in a clean cloth) for 10-minute intervals to help with swelling.
Days 2-3: The Swelling & Sensitivity Peak
Welcome to peak swelling. Your lips might feel even more swollen on day two than they did immediately after the procedure. The color will remain intense, and your lips will feel very dry and tight. This is a critical time for post lip blush care.
To stay comfortable, eat soft, non-spicy foods in small bites. While some people use a straw, it can create pressure and friction on healing lips, so it’s often best to drink carefully from a glass. To help minimize swelling, try sleeping with your head slightly elevated on an extra pillow.
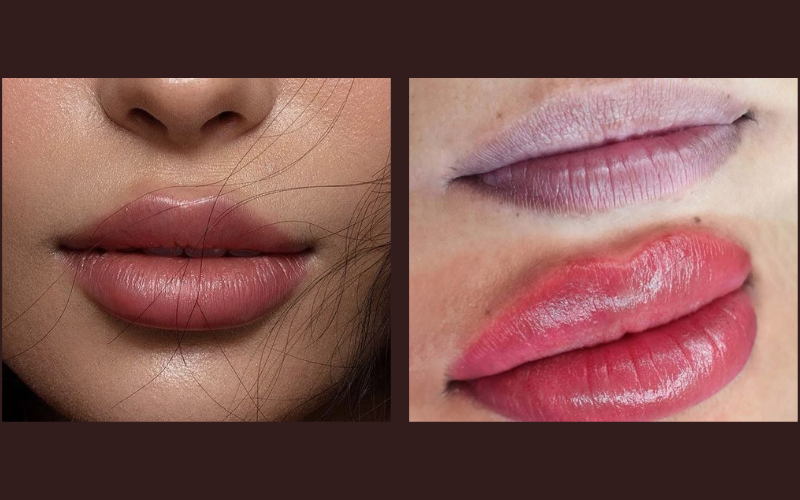
Days 4-7: The Peeling Phase (The “Ghosting” Stage)
During this phase, the swelling will subside significantly, and the lip blush peeling process will begin. Your lips will start to flake, revealing a much lighter color underneath. It is absolutely crucial that you do not pick, peel, or scratch the flaking skin. Doing so can pull out the pigment, leading to patchy results, scarring, and an increased risk of infection.
As the top layer sheds, you’ll likely experience the “ghosting” or “milky” phase. The color may seem to disappear or look very pale and uneven. Don’t panic! This is a normal part of the healing stages of lip blush. The true color is developing in the deeper layers of your skin and will bloom again over the next few weeks. Keep moisturizing diligently to manage any itchiness and help the skin shed naturally.
Weeks 1-2: The True Color Begins to Emerge
By now, the peeling should be complete, and your lips will feel much less sensitive. The ghosting phase will start to fade as the pigment begins to resurface. You’ll notice the color slowly “blooming,†becoming more visible each day. It may still appear lighter than your final desired shade, but the initial patchiness will even out. Continue to protect your lips with a moisturizing balm.
Weeks 3-6: Final Color Settles & Touch-Up Window
This is when the grand reveal happens. The true, final color of your permanent lip color will fully settle and stabilize in your skin. The texture of your lips will be back to normal. This is also the perfect time to assess your lip blush results. You can now see the final healed shape and pigment density.
Most lip blush procedures require a touch-up session, typically scheduled around 6-8 weeks after the initial appointment. The lip blush touch up is essential for perfecting the color, filling in any areas where pigment didn’t take as well, and ensuring the longevity of your cosmetic tattooing. If you’re searching for a trusted provider who specializes in lip blush color correction and flawless touch-up sessions, Hivivi offers expert solutions tailored to your healing stage.
Full Healing & Long-Term Care (Beyond 6 Weeks)
After your touch-up has fully healed (following a similar, but often shorter, timeline), your lip blush journey is complete. To maintain your beautiful results, sun protection is non-negotiable. Apply a lip balm with SPF daily, as UV exposure can fade the pigment prematurely. Stay hydrated and avoid using harsh exfoliants like retinoids or acids directly on your lips. With proper care, your results can last 1-3 years before a color refresh is needed.
Lip Blush Aftercare: Your Guide to Optimal Results
Following a strict aftercare routine is just as important as choosing a skilled artist. Proper lip tattoo aftercare protects your investment and ensures the best possible pigment retention.
The D.O.s of Lip Blush Aftercare
- Moisturize, Moisturize, Moisturize: Keep your lips constantly hydrated with an approved lip blush aftercare balm provided by your artist. Apply a thin layer frequently throughout the day.
- Gentle Cleaning: Blot your lips with a clean tissue or damp cotton pad as directed, especially during the first 24 hours.
- Stay Hydrated: Drink plenty of water to help your skin heal from the inside out.
- SPF Protection: Once the peeling is complete, use a lip balm with SPF 30 or higher to protect your results from fading.
- Eat & Drink Carefully: Stick to non-greasy, non-spicy, and room-temperature foods for the first few days.
- Sleep Elevated: Use an extra pillow for the first couple of nights to help reduce swelling.
- Practice Hygiene: Always wash your hands before touching your lips and use a clean pillowcase.
The DON’Ts of Lip Blush Aftercare
- No Picking or Peeling: This is the golden rule. Let the skin flake off naturally to avoid ruining your results.
- Avoid Extreme Temperatures: Steer clear of hot showers, saunas, steam rooms, and direct sun exposure during the initial healing period.
- No Lip Makeup: Do not apply any lipstick, gloss, or chapstick (other than your aftercare balm) until your lips are fully healed.
- Avoid Certain Products: Keep cleansers with acids (AHA/BHA), retinoids, and whitening toothpaste away from your lips.
- Minimize Mouth Stretching: Avoid big bites, excessive laughing, or kissing for the first few days.
- No Swimming: Stay out of pools, hot tubs, lakes, and oceans to prevent infection.
- Avoid Sweaty Workouts: Limit intense exercise for the first week, as sweat can irritate the healing skin.
Common Lip Blush Healing Concerns & When to Seek Professional Advice
It’s natural to have questions during your lip blush recovery. Here’s a quick guide to what’s normal and what’s not.
It’s Normal If…
- You experience swelling, tenderness, and tightness for the first few days.
- The color looks extremely bold initially.
- Your lips feel very dry and start to flake or peel around day 4.
- The color seems to fade or “ghost” after peeling.
- You have mild itching as the skin heals.
When to Contact Your Artist or Doctor (Red Flags)
While rare, infections can happen. Contact your artist or a healthcare professional immediately if you experience:
- Excessive swelling or pain that worsens over time.
- Green or yellow pus, a foul odor, or persistent oozing after day 2.
- Severe redness or warmth that spreads beyond the lips.
- Fever or chills.
- A sudden rash or signs of an allergic reaction.
What Influences Your Lip Blush Healing?
Every individual heals differently. Several factors can influence your personal healing timeline and final results:
- Genetics and Metabolism: Your body’s natural healing rate plays a significant role.
- Skin Type and Age: Oily skin may heal differently than dry skin, and mature skin may take longer to regenerate.
- Immune System Health: A strong immune system supports a smoother healing process.
- Adherence to Aftercare: Following instructions is the biggest factor you can control.
- Artist’s Technique: A skilled artist’s gentle hand minimizes trauma to the skin.
- Pre-existing Conditions: If you are prone to cold sores, you must take preventative medication to avoid a lip blush cold sore outbreak, which can affect pigment retention.
Embrace Your Beautiful Lip Blush Results
The lip blush healing process is a journey of transformation. By understanding the stages, committing to proper aftercare, and practicing a little patience, you set yourself up for success. The initial week of swelling and peeling is a small price to pay for years of effortless, beautifully tinted lips.
Trust the process, follow your artist’s guidance, and get ready to enjoy the stunning, natural-looking results of your permanent makeup investment. Your perfect pout is just a healing journey away.
Leave a Reply